Contents:
- Understanding Your Hair Clipper Setup
- Cost Breakdown: Investing in Quality Tools
- Pre-Cutting Preparation: Setting Yourself Up for Success
- The Fundamental Technique: How to Use Hair Clippers Correctly
- Grip and Hand Angle
- Direction of Cutting: Against the Grain
- Speed and Pressure: Less Force, Better Results
- Seasonal Maintenance Timeline: Year-Round Clipper Care
- Monthly (January, April, July, October)
- Quarterly (End of March, June, September, December)
- Annually (December Review)
- Creating Different Styles and Cuts
- The Basic Fade
- The Crew Cut
- The Burst Fade
- Practical Tips for Superior Results
- Troubleshooting Common Problems
- Frequently Asked Questions About Hair Clippers
- Next Steps: Building Your Clipper Confidence
Professional barbers didn’t start their craft overnight—and neither do you need to. Hair clippers are one of the most powerful tools in modern grooming, yet most people struggle with them because they’ve never been taught the fundamentals. This guide changes that. Whether you’re maintaining your own fade, creating sharp lines, or experimenting with new styles, understanding how to use hair clippers properly transforms your grooming from frustrating to transformative.
The beauty of learning how to use hair clippers is simple: you gain control over your appearance and save hundreds of pounds annually. A basic haircut costs £15-30 in the UK, and repeat visits add up fast. Within an hour of practice, you’ll be confidently managing your own cuts or helping family members achieve professional results. Let’s dive into what actually matters.
Understanding Your Hair Clipper Setup
Every clipper consists of three critical components: the motor, the blade, and the guards. The motor determines cutting speed—typically 3,000-4,000 strokes per minute for cordless clippers and up to 5,000 for corded models. Don’t overthink this number; faster isn’t always better. A steady 3,500 strokes per minute cuts cleanly without pulling hair or creating heat buildup.
Blades come in two types: rotary and oscillating. Rotary blades spin continuously (think of a propeller), excellent for thick or coarse hair. Oscillating blades move back and forth rapidly, ideal for finer hair and detailed work. Most home-use clippers use oscillating technology for precision and ease of control.
Guards are your safety net. They sit between the blade and your hair, determining cutting length. A standard set includes guards from 0 (closest cut, roughly 0.5mm) to 8 (longest, around 25mm). Numbers vary slightly between brands—a #3 on one clipper might cut slightly differently than on another. Test your specific guards on a small, hidden section first.
Cost Breakdown: Investing in Quality Tools
You don’t need to spend a fortune to get started:
- Basic cordless clippers: £25-50 (suitable for occasional home use)
- Mid-range corded/cordless hybrid: £50-120 (reliable for regular maintenance)
- Professional-grade equipment: £150-350+ (for frequent use or styling work)
- Replacement blades: £8-15 each (buy one or two extras)
- Clipper oil and cleaning supplies: £10-20 total (essential for longevity)
A £60-80 clipper with decent reviews will serve you for years. Brands like Wahl, Andis, and Philips offer reliable options across price points. Don’t assume expensive always means better—read user reviews specifically about cutting consistency and durability.
Pre-Cutting Preparation: Setting Yourself Up for Success
The difference between amateur and professional-looking cuts starts before the blade touches hair. Preparation determines 40% of your result quality.
First, wash your hair with warm water and dry it completely. Damp hair cuts unevenly because water swells the hair shaft, altering how much length the guards remove. Let hair air-dry or use a blow-dryer, then comb through thoroughly to remove knots and tangles. Even small mats redirect the clipper’s path.
Second, secure your workspace. Sit under good lighting—natural daylight or a bright LED lamp positioned to eliminate shadows. Keep mirrors positioned so you can see the back and sides easily. Many people use two mirrors: one in front and one behind, angled to create a reflection of the reflection.
Third, protect your surroundings. Hair clippings scatter everywhere. Drape a cape or old towel around your shoulders, stand over a tile floor or bathtub, or wear clothes you don’t mind getting clipper dust on. This takes two minutes and saves cleanup time.
According to Marcus Denton, a trichologist with 15 years’ experience at the UK Institute of Trichology, “Hair clippers demand respect for cleanliness and technique. The best cuts fail when the hair isn’t properly prepped or when clipper maintenance is neglected. Most home users skip these steps and wonder why their results look unpolished.”
The Fundamental Technique: How to Use Hair Clippers Correctly
Technique separates serviceable cuts from great ones. Master these principles and everything else follows logically.
Grip and Hand Angle
Hold the clipper like a pencil, not like a baseball bat. Your thumb and first two fingers grip the barrel, just above the blade guard. Keep your wrist straight and relaxed—tension transfers to the clipper and creates shaky lines.
The angle matters enormously. For most clipper work, maintain a 45-degree angle between the blade and your head. This creates a clean cutting action. A perpendicular angle (90 degrees, straight into the scalp) pulls hair rather than cutting it. An angle too flat misses hair entirely.
Tilt the clipper slightly away from corners and sensitive areas like around ears. This gentler angle prevents accidental skin contact and irritation.
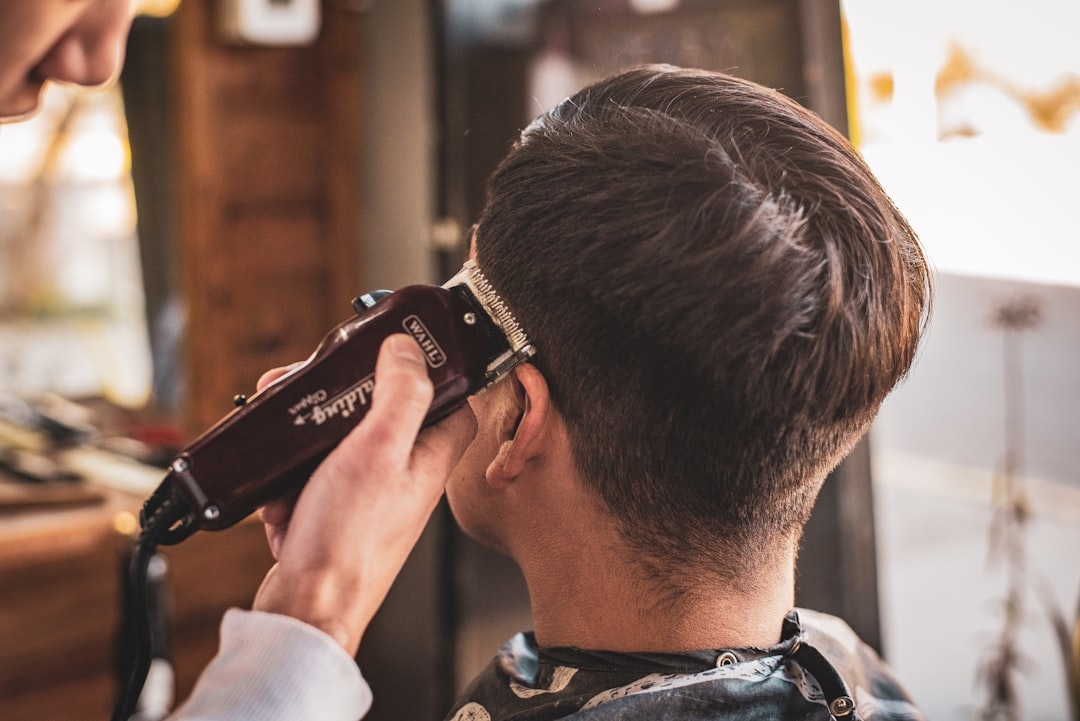
Direction of Cutting: Against the Grain
Hair grows in a specific direction on your scalp called the grain. Always cut against the grain—pushing the clipper upward when hair grows downward. This gives you maximum control and the cleanest cut.
On the sides and back, hair typically grows downward. Push the clipper upward from the nape toward the crown. On the top, grain direction varies; observe which way your hair naturally falls, then cut in the opposite direction.
Use smooth, continuous strokes rather than short, jabbing motions. A long, steady stroke from scalp to the ends of your hair creates uniform length. Stop when you reach the ends, then lift the clipper away rather than twisting it.
Speed and Pressure: Less Force, Better Results
Let the clipper do the work. Apply minimal downward pressure—the weight of the clipper itself is usually sufficient. Pressing hard doesn’t cut faster; it creates pulling sensations, discomfort, and uneven results.
Move slowly and deliberately. A slow, controlled stroke gives you time to maintain proper angle and feel any catching or pulling. Speed develops with practice; rushing is the primary cause of clipper mistakes.
Seasonal Maintenance Timeline: Year-Round Clipper Care
Your clippers need regular maintenance to perform consistently. Here’s a seasonal approach:
Monthly (January, April, July, October)
- Oil the blade after every 3-5 uses, or monthly if less frequent
- Check for loose hair wrapped around the blade assembly
- Test the clipper on a small area to ensure consistent cutting
Quarterly (End of March, June, September, December)
- Deep clean the blade with a dedicated clipper cleaning brush
- Inspect the power cord for damage (corded models)
- Replace guards if they show signs of damage or corrosion
Annually (December Review)
- Consider professional blade sharpening if cutting performance declines
- Replace the blade entirely if sharpening doesn’t restore performance
- Check battery health on cordless models and consider replacement if runtime drops below 30 minutes
In 2026, most quality clippers last 5-7 years with consistent care. Neglected clippers fail within 18-24 months. The difference is literally five minutes monthly of proper maintenance.
Creating Different Styles and Cuts
The Basic Fade
A fade blends shorter lengths at the sides into longer hair on top. Start with your #2 guard and cut from the nape upward, stopping about 1 inch below where the fade ends. Next, use a #4 guard on the area above that, then a #6 on the very top. Overlap each section slightly to create a gradual transition.
The key is multiple passes with gradually longer guards, not attempting the fade in a single pass. Professional fades require patience and blending.
The Crew Cut
Versatile and low-maintenance, the crew cut works on nearly every face shape. Use a #2 guard all over, except blend slightly longer on top by switching to a #3 guard for the crown area. This creates subtle dimension without looking complex.
The Burst Fade
More advanced, but achievable with practice. Instead of straight vertical blending, the burst fade curves around the back of the head. This requires finer clipper control and typically benefits from clipper guards designed specifically for curved transitions. Most beginners should master straight fades before attempting burst fades.
Practical Tips for Superior Results
Section your work deliberately. Before cutting, mentally divide your head into four sections: left side, right side, back, and top. Cut each section completely before moving to the next. This prevents patchy, uneven results.
Use the clipper blade as a guide, not a weapon. Your goal is guiding the clipper smoothly, not forcing it through hair. If you encounter resistance or hear grinding, stop immediately. The blade may be dull or dirty.
Keep guards clean between uses. Hair clippings jam into guards and prevent proper contact with the blade. A quick rinse under warm water after each major section prevents buildup.
Work in natural light whenever possible. Artificial light, even bright bulbs, creates shadows that hide uneven cutting. Natural daylight is the gold standard for judging length and evenness.
Make small corrections immediately. If you notice a patch that’s longer than intended, fix it right away rather than hoping nobody notices. Small adjustments take seconds; waiting means dealing with obvious mistakes later.
Take breaks to check progress. Every 5-10 minutes of cutting, step back and evaluate. View your work from different angles and distances. Small mistakes are easier to correct before you’ve committed to a whole section.
Troubleshooting Common Problems
Pulling or tugging sensation: The blade is likely dull or the hair is damp. Sharpen or replace the blade, and ensure hair is completely dry. Also check that guards are seated properly on the clipper.
Uneven cutting or patchy results: You’re likely changing angle mid-stroke or applying inconsistent pressure. Focus on smooth, consistent strokes with the same angle throughout each pass.
Clipper skipping or missing sections: Hair is tangled or matted. Comb thoroughly before starting and between sections. Use a fine-tooth comb or clipper comb to detangle resistant areas.
Heat buildup or motor slowing: The blade needs oil and cleaning. Clogged blades create friction and overheat the motor. Oil immediately and do a deep clean.
Inconsistent length across one section: You’re likely tilting the clipper at different angles during successive passes. Hold your wrist rigid and make mental reference points on your head so each pass follows the same path.
Frequently Asked Questions About Hair Clippers
Q: How often should I oil my clippers?
A: Oil after every 3-5 uses, or at minimum monthly. A single drop on each side of the blade is sufficient. More oil doesn’t improve performance and attracts hair clippings.
Q: Can I use regular machine oil instead of clipper oil?
A: Not recommended. Clipper oil is lighter and won’t gunk up the blade mechanism. Regular machine oil accumulates and actually worsens performance. Clipper oil costs £3-5 and lasts months.
Q: What’s the safest guard size for beginners?
A: Start with a #3 or #4 guard, which cut to roughly 10-12mm. These lengths are forgiving—minor angle changes don’t create obviously different results. As your technique improves, experiment with shorter guards for more dramatic definition.
Q: How do I avoid cutting my ears or neck?
A: Use a slightly flatter angle (less aggressive) in these areas, move slowly, and keep your opposite hand positioned to feel where the clipper blade ends. Clippers aren’t infinitely sharp—pressing gently reduces any risk. Most discomfort comes from pulling, not from true cuts.
Q: Should I cut wet or dry hair with clippers?
A: Always dry. Wet hair appears longer than it actually is because water weight stretches the hair shaft. You’ll cut more off than intended. Dry hair also feeds more smoothly through clipper blades.
Q: How long does it take to learn basic clipper skills?
A: Simple cuts like crew cuts or basic fades typically take 2-4 practice sessions before consistent results. Complex cuts like detailed designs or intricate fades require 10-20 hours of practice. Expect your first attempt to look rough—this is completely normal.
Next Steps: Building Your Clipper Confidence
You now understand how to use hair clippers with proper technique, maintenance, and problem-solving. The journey from reading this to mastery happens through practice, not theory. Start with simple cuts on your own hair or a willing family member. Your first fade won’t be perfect—that’s the point. Each cut teaches you something about angle, pressure, or technique.
Invest in a reliable clipper in the £60-100 range, commit to monthly maintenance, and practice deliberately. Within three months of monthly cuts, you’ll achieve results that rival professional work. Within six months, you’ll develop the intuitive sense for blade angle and pressure that separates competent from exceptional results. The best part? You’re building a skill that pays dividends for life. That’s the real power of mastering how to use hair clippers.
Add Comment